Monday, March 19, 2012

Leather Jack!

Well I've been rather absent in posting, but that's because I've been making stuff! I had a goal to complete 4 projects in February and I did. Several of those items are gifts and will make their debut once they've been delivered to their recipients!

At Halloween I posted the paper Jack from The Nightmare Before Christmas that I'd made, and how I'd really wanted to make him out of leather to get the textures and depth. Well since I first had that idea over a year ago, I enlisted my Mum to keep her eye out for some white leather, which I wasn't having any luck with. Low and behold for Christmas there was a nice big piece in my stocking! So I dug out my pattern and got to it!


He looks much more like I had envisioned now. 

You can see the textures, and the depth of the layers coming out of the frame.  

The leather stitching also looks a lot better than the string had. 

Tuesday, February 7, 2012

Zelda Marquetry Frame Completed!

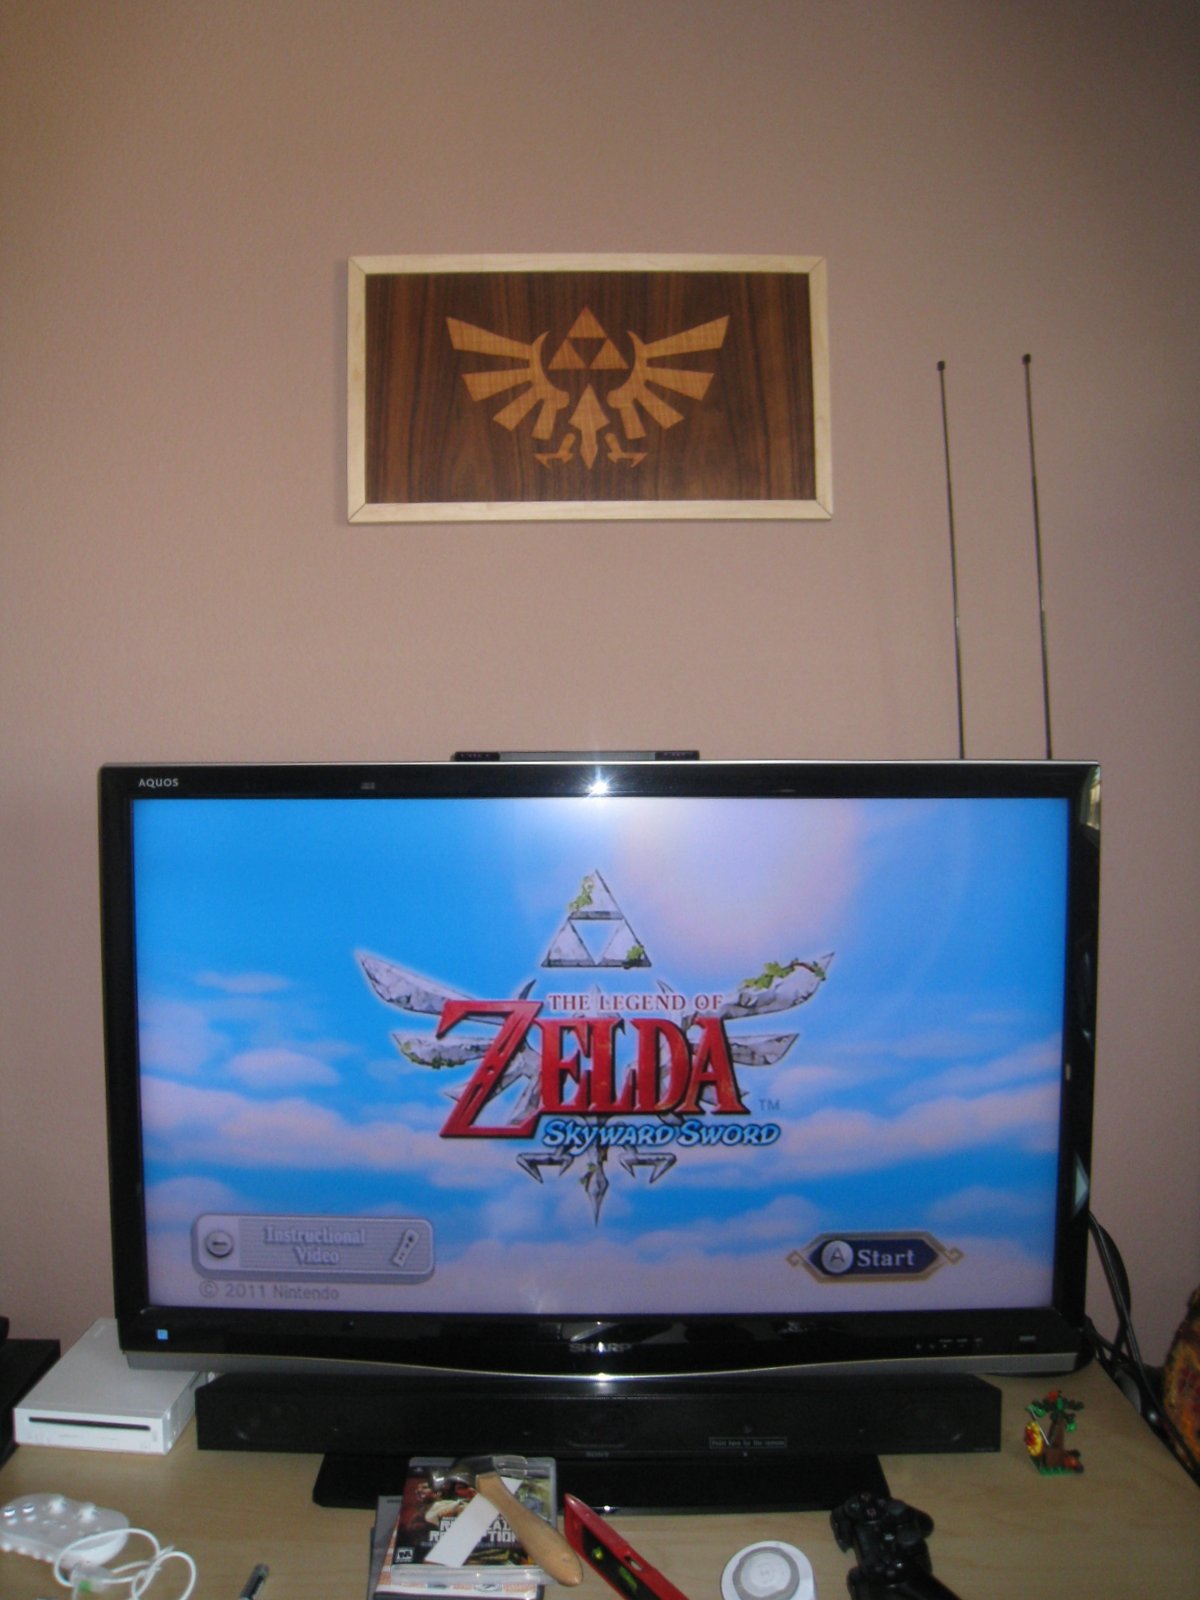
Well you may remember mid last year when I posted about a marquetry project I had done of the Zelda crest. The frame got put on the back burner a bit, but I finally got it all sorted out and finished this past weekend! Yay! 

Here it is with the frame installed

I added a layer of the dark veneer in the corners of the frame for an accent. 

I rabetted out the back so that the picture could sit flush with the back of the frame. This way I could use the removable hardware you see (from Lee Valley of course!), so that if I need to re-wax the picture, or decide I want to make a different frame, I can do it easily. I also drilled two holes to allow for screws to hold it to the wall.

With the final coats of wax on it, the neat grain pattern of the crest really shines out.


Finally after all the work of finishing and hanging it, I decided to relax the best way I could think of. Playing Zelda!! 

Friday, February 3, 2012

Giraffe Stuffed Toys

I love these stuffed giraffes! I've made a total of 6 of them now, and I still love them! Pretty much the hardest part is finding fuzzy giraffe print fabric. The patterns are from Carol's Zoo who makes a whole bunch of easy patterns for various animals. I've also made the penguin, and have the pattern for several others, but haven't gotten to them yet. You can check them all out here: http://www.carolszoo.com/patterns/index.htm.


The last pair I made were especially cute as I found red and blue giraffe print which was perfect as I had a friend and cousin who were both having babies, one boy one girl! For these ones, I simple took a few tight stitches for the eyes so there would be no risk of choking or anything.


This was the original set that I made, I started with one but couldn't stop. They worked out nicely as the print I found was more to scale for the size. I've only made the "Baby" giraffe, but he sits about 12" tall, so he doesn't seem too small. The pattern also comes with a "Mama" version. These ones I bought plastic safety lock eyes in different colours to finish them off since I was giving them to more grown up types.


The patterns are really straight forward and simple to follow. Only two pattern pieces. The sewing is pretty easy. The only trick I've found is to pin alot! Maybe this was just necessary as my fabrics were a bit stretchy. But I found if I took the extra few minutes to pin the heck out of them, then sewing took a fraction of the time. They look kind of funny all pinned up too! Anyways, if you're looking for a cute, easy, fun stuffed animal project, these are a fun place to start! 

Wednesday, January 25, 2012

E-book Reader Cover

A while ago we got an E-Reader and I've been wanting to bring it to work to read at lunch, but have been hesitant without some sort of case to protect it. We could have bought one, but of course I thought making one would be better, and more fun. Here's how it went!


This is my design/pattern/notes and instructions that I made up.
Very high tech as you can see!

   
I've been on a stripey fabric kick lately, so I picked one of my favourites and a complementary fabric to make the cover. 

I decided to use an elastic to keep it closed - like a Moleskine. 
   
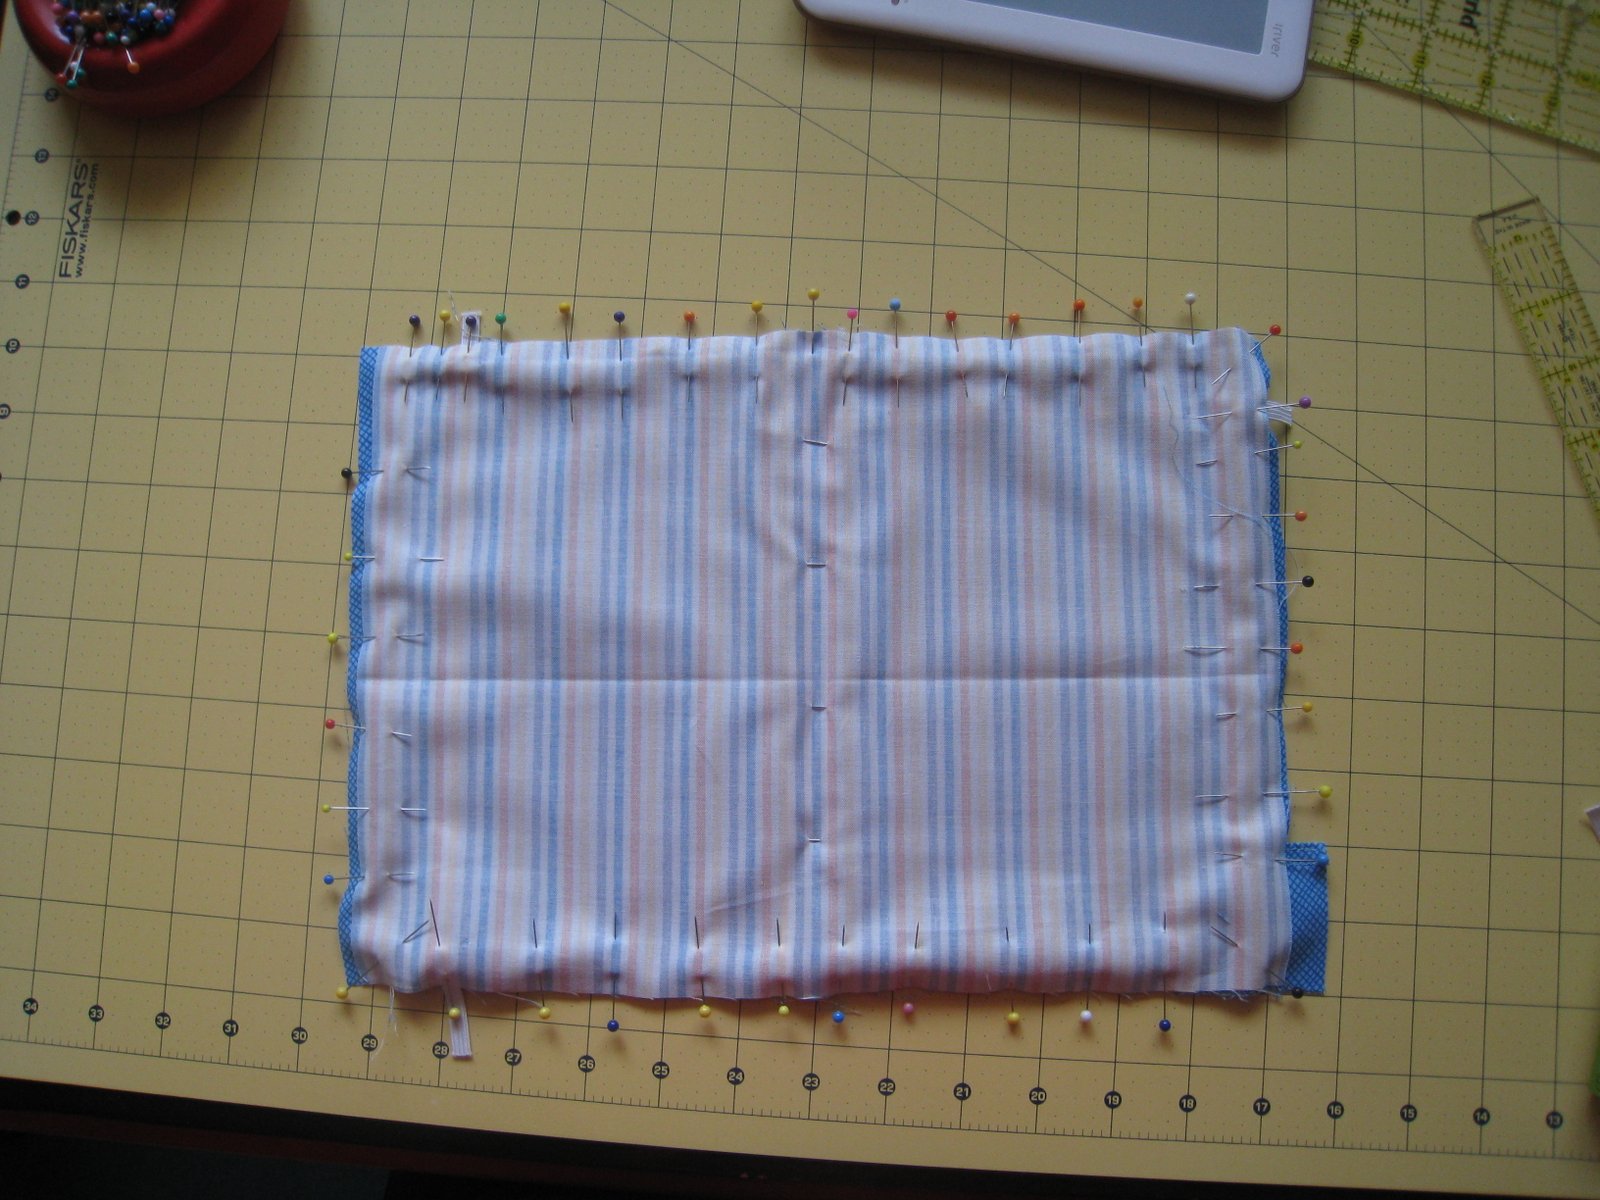
An after several attempts and much figuring out, I got all the layers and elastic pinned together inside out.

I made the inside in two halves with another strip of fabric in the middle so that I could slip in some hardboard and padding to protect the Reader. Once the layers were all cut to size and inserted, I sewed it in place which secured everything, as well as closed the pocket and the elastic to hold down the Reader. 

And here is the finished product!!

I was pretty happy with how it turned out considering I didn't have a real pattern or anything to go off of. 

Now I just have to get some E-books...

Wednesday, January 18, 2012

Free Motion Scroll

I managed to make a few Christmas gifts this year, and this was a project that had been on my mind for a while in different forms. It all started out just over a year ago when I was at a quilt show and came across a booth that sold antique sewing stuff. With my mum having a collection of old machines and bobbins etc, I took a look to see if there was anything neat. What I found were a few pairs of bobbins/spools that were pretty nice and about 4" tall. I immediately thought of making some kind of scroll with them.


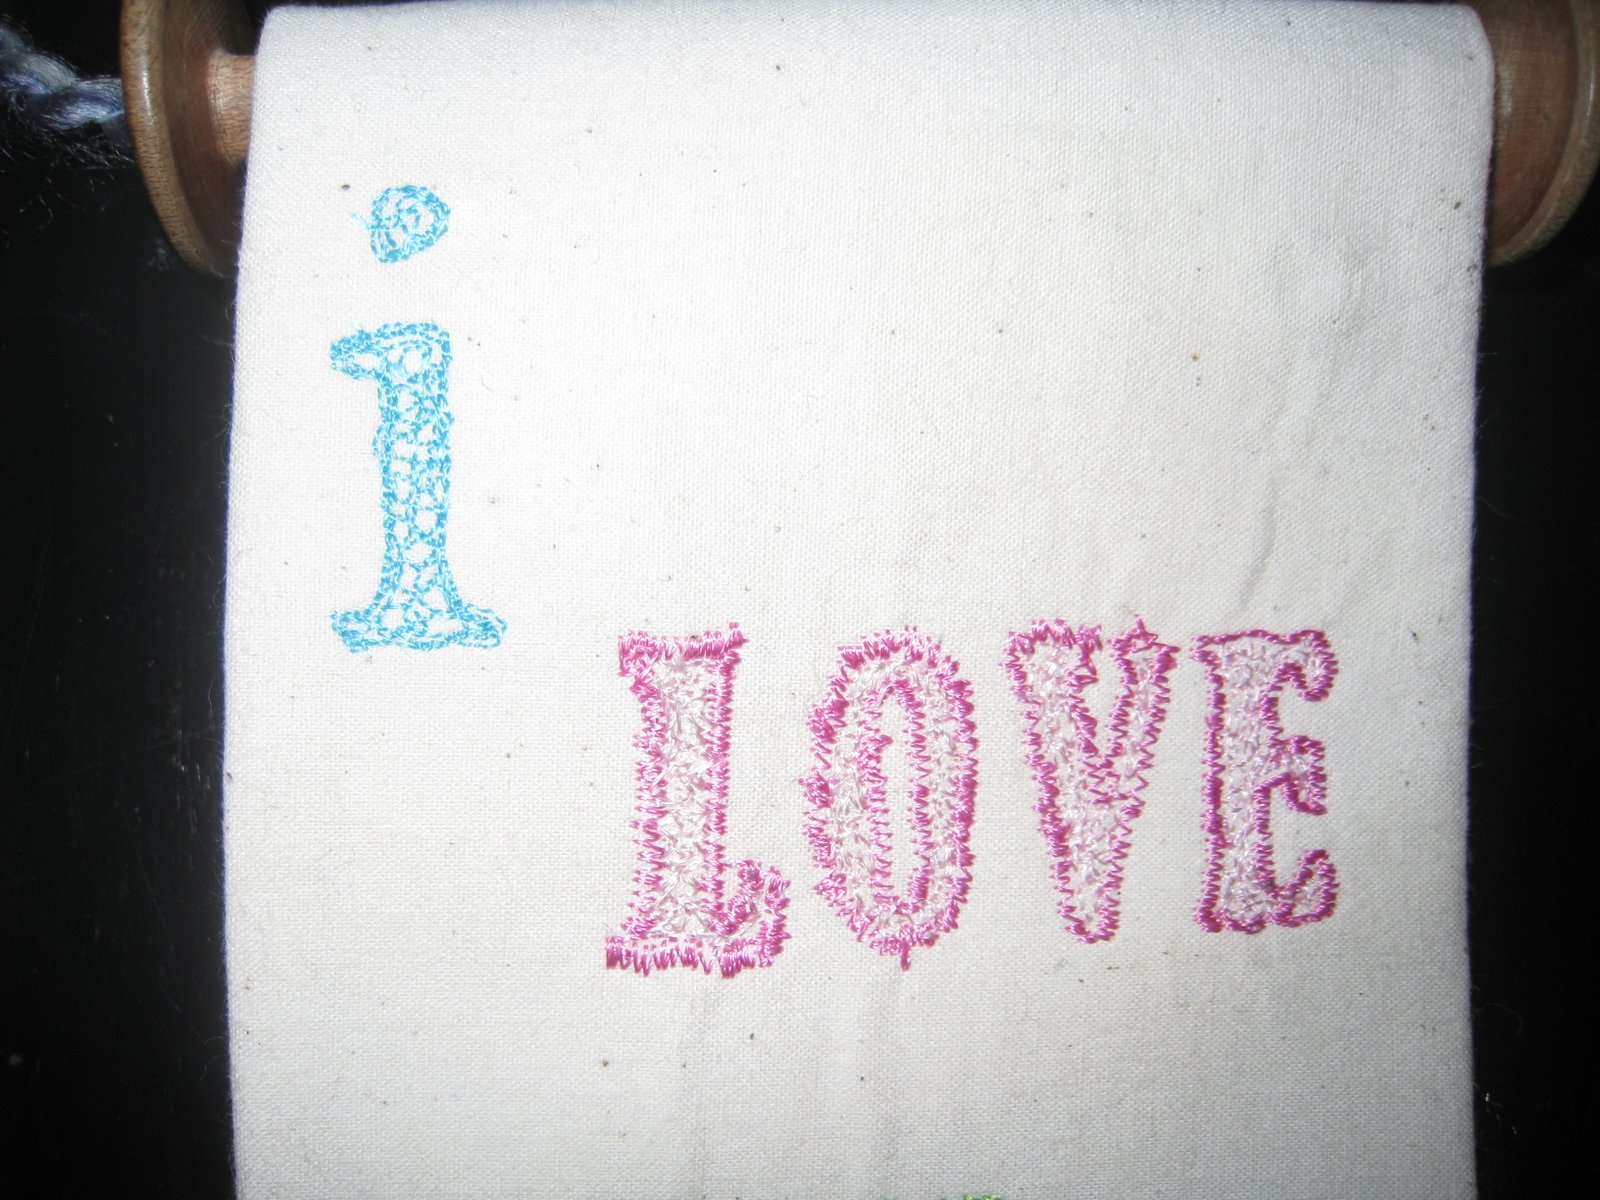
After much brainstorming and doodling in my notebook on and off for the year I decided to just get on with it and decided to practice my free motion sewing and make a little scroll for my mum to hang in her sewing room. I had jotted down "I love you sew much" in my notebook, my brain works in very punny ways sometimes, and decided that would be my message. I measured and drew out a template in Illustrator, then I wrote up the message and messed around with the sizes, fonts and spacing until I had something I was happy with. I printed it out and traced it only my fabric with a water soluble quilting marker. Then I just started free motion embroidering.


I outlined some letters, tried zigzagging in places.


I used various colours of threads. Sometimes layering them, sometimes using variegated threads.


And basically just tried all sorts of things that I had been too chicken to try, but figured I had nothing to loose. It was a bit like a sampler in fact! 

 I attached a back with some snaps on it, so that I didn't have to sew through the front, and in case it ever needs to come off the bobbins, and was done! And in the end despite all my procrastinating and worrying that it wouldn't turn out, well, it wasn't so bad! So next time, I'll just try and jump in! 

Wednesday, December 28, 2011

Lego Photo #3: Holiday Edition 2011


Merry Christmas and Happy New Year! 

This was my latest Lego photo endeavour as well as our Christmas photo for the year! I kept it quite simple, placing everything on some cotton batting to try and mimic snow, and back lit it with sunlight to make the star glow as much as possible. I wanted to try doing it on real snow, but that is sadly it is lacking in California! 

Thanks to all of your folks for taking interest in the projects I working on this year and for all your supportive comments and questions. I'm hoping to do even more posts next year so I hope you'll enjoy!

Wednesday, December 14, 2011

Lego Photo #2 - Curling Edition

I've been working away at top secret Christmas gift projects and so haven't really had much that I can post on here recently. I did however make this little vignette for my Dad's birthday card last month. It's a little montage of me and my dad, and our good friends Paul and Ken all curling together. 


It was pretty fun trying to make little curling rocks - and they do rock in fact! They have little round bases, and so can slide and spin around. The ice part was rather time consuming - placing all the tiny pieces, but I think in the end it turning out fairly realistic. I did some photoshopping on it to give it a more aged appearance which I think fits the picture better. Notice how I made sure I'm not sweeping!!