Saturday, November 22, 2014

Marquetry Belt Buckles

Just over a year ago, I started making marquetry belt buckles. This past week I finished my 7th, so thought it might be time to blog about them! They are nice small projects (2" x 3") that are good for trying techniques on a small scale and have the benefit of being a cool useful item when they're done. I wear one of them almost every day, and enjoy choosing the one that fits my mood for the day.

This is my most recent one. A 1-up mushroom from Mario. I used this to try sand shading for the first time. The darkened areas of the mushroom that give it a more round look are achieved by holding the individual pieces in a pan of hot sand and basically toasting them! I also tested out a shellac finish on this one. The green material is a dyed veneer, and you have to be more careful with the finish so that it doesn't run. This was a good test, as I am working on a bigger project with similar veneer and wanted to have the process figure out before applying it to the big project. 

This was my very first belt buckle. I was hesitant to spend a lot of time cutting out a pattern, not know how it would work and how it would hold up to everyday wear. It worked better than I expected, hence making so many more. I used regular polyurethane for the finish on this one. 

This was a design I doodled one day, I thought the idea of a heart shaped gear was kind of neat. I cut it carefully and got two for one. By stacking the two colours on top of each other, the cut out of one, inserts in the other, and you get two very different looking buckles with the same design. I tried using Waterlox as a finish on these for the first time. I really liked how easy it was to apply and how durable it was as a finish. 


For these two, I used the same process to get two versions of the same design. I wanted to recreate an Escher tesselation, highlighting the main piece. So I decided to practice woodburning on veneer to outline all the surrounding flying fish. It was interesting to see how the veneer handled the wood burning and practicing how much heat and pressure to apply to get the right result. 

And then of course you may already know I'm a big Lego fan, so I decided to make a Lego Minifigure buckle. The main challenge to this one was to cut the tiny hands without them falling apart or cracking. I also got to see how to create the separation between the arms and the body by just making a cut in the wood. 

To turn these little pieces into belt buckles I buy these buckles from Amazon, and just screw them onto the back. The nice thing about this is, if I decide later I am tired of one design, I can just remove the hardware and attach it to a new buckle design!


Sunday, October 19, 2014

Lightbulb Birds

This was a fun project I finished a while ago. It was from an issue of Cloth Paper scissors. I made one to their suggestion, then modified it to make the penguin. Can you guess what the base of the birds was?!

If you guessed burnt out light-bulbs, you win a prize! After this initial step a lot of paper clay covering and sculpting was involved and then painting. It was a first for me doing much of either, so it was quite a learning experience.

But I think they turned out to be pretty cute. 

And are quite the pair of feathered friends! 

Thursday, October 9, 2014

Re-Purposing a Found Outdoor Table


Last month I made a short but very fun trip back home to Ottawa. We spent quite a bit of time doing projects of various sizes and shapes. This was one of the simpler ones. Earlier in the summer my Mum and Cousin came across this table on someone's lawn. It had seen better days, but my Mum had a vision!

To get it home in the car, she had to sit in the trunk holding it in, as the back of the car couldn't close. Luckily it was only a block or so away from our house! Looks like they had a pretty amusing time getting it home. 

The first problem with the table was that it was too big for the deck area and use that she envisioned. So I started by cutting a few of the boards off the top. I just used a hand saw, but it was pretty quick work. The table was made of really nice cedar which has a lot of good life left in it. 

I cut the matching boards off the other side. We did this one board at a time so we could see the size as we went to judge when it was just right. 

The next problem to address was that it was too tall. So using a square and the hand saw again, I cut each of the four legs to a better height. 

Mum seemed pretty happy with the result so far! The round edges give it some character, with it being more manageable now that it's narrower. 

Finally I trimmed the braces at an angle so they taper down from the table top to look more intentional. And we set it in place. Looked pretty good. In the spring it will get sanded and painted and be a great addition to the deck! 

Thursday, September 25, 2014

Combining Turning and Marquetry - A Cavalier Tealight Holder

This was an experiment of sorts I did attempting to combine turning and marquetry. Several people in our marquetry club had shown pieces along the same lines, including plates and boxes. I decided to attempt a tealight holder. The first step was to turn the main body. I cut a small inset around the middle for the veneer, and drilled a hole in the top for the tealight. I don't seem to have any pictures, but it was the first turning I'd done in a while, so it was a bit of a challenge. 

The next challenge was laying out a design that would fit around the circumference, and that you wouldn't see the join line. I chose two Cavalier King Charles Spaniels with a butterfly. I cut them stacked, so that I actually got two copies of it, but in opposite colourways. 

Here's a more detailed shot. The height was trimmed to the exact height of the inset, and the length was slightly longer than the circumference. 

It was at this point that I realized that I'd made my life harder than necessary. While the veneer bends quiet well, especially when covered with glue, the very tight radius I'd chosen, made it very finicky to bend without it cracking. In the end, after quite a while, I got it to work. It gets glued in two stages. During the first step, I put glue on all but the last half inch on each side, to get the majority of the piece in place. When it was dry, I put a straight edge over the overlapping end bits, and made a cut with an exacto-knife through both of the pieces at once. This gives a really tight, perfect fit. I then glued the last bits. Rubber bands are the only real way to clamp it in place. I didn't have enough hands while trying to get everything aligned to take step by step photos, but am planning another similar project, where I'll show this more clearly. 

I stamped my initials in the bottom as a signature. Then added several coats of Waterlox Finish, and buffed it on the Beall Buffing system.

And this is how it turned out. I really like how no matter which way you look at it, there's something to see. So in the middle of the table, it's interesting for everyone. I definitely learned a lot doing this project, including many things I'd do differently to improve on it, and am quite excited to give it another go! 

Wednesday, September 17, 2014

Winnie the Pooh Marquetry Picture

So it's been a while since I've posted any projects here, but not for lack of making stuff. Things got put on hold for a bit while Jerome and I went on an epic adventure to southeast Asia! (You can click here to read more about this if you're interested) But now that we're back, and have organized all our photos I have a back log of projects that I'll be sharing over the next while. 


I thought I'd start with a pretty simple one I made for a friends baby. Growing up, I had a wood version of this image that had been my Mum's and I always thought it was so cute. So I decided to make a marquetry version. It's a very simple process, just put the two colours of veneer on top of each other, and cut through both to get the perfect fit. I glued it to some plywood, added matching veneer around the edges and back, as well as a hook hole at the back, a few coats of Waterlox and voila! 

Tuesday, December 31, 2013

Happy Holidays! - Lego Charlie Brown Christmas Edition


Wishing everyone a belated Merry Christmas and a wonderful New Year to Come!!

Wednesday, October 9, 2013

Wedding Logo - Marquetry Coasters

A couple of good friends from school got married this spring. I wanted to send them something special to celebrate! Being a designer, she had designed a really cool logo/crest for their invitations and website and favours. I thought it was really cool, and wanted to use it in some way.


It was a bit tricky, since I had a printed version that was about an inch in diameter. I scanned it and blew it up to a size where I could have a chance at cutting it out of wood. Unfortunately, the outer text was still too small, so I decided to opt for the inner section only. I was originally thinking of doing it as an ornament, but Jerome chimed in that he thought something more practical would be fun. And so we came up with the idea of a pair of inverse coasters, which could be both practical and decorative.

Here you can see the marquetry completed. I didn't manage to take any process pictures as it required a lot of concentration to get all the tiny curved parts just right. But you can see that the cut out of one colour becomes the insert on the other. So by cutting both at once very carefully, I ended up with two! 

Here is a close up of the front of one of them without the tape. 

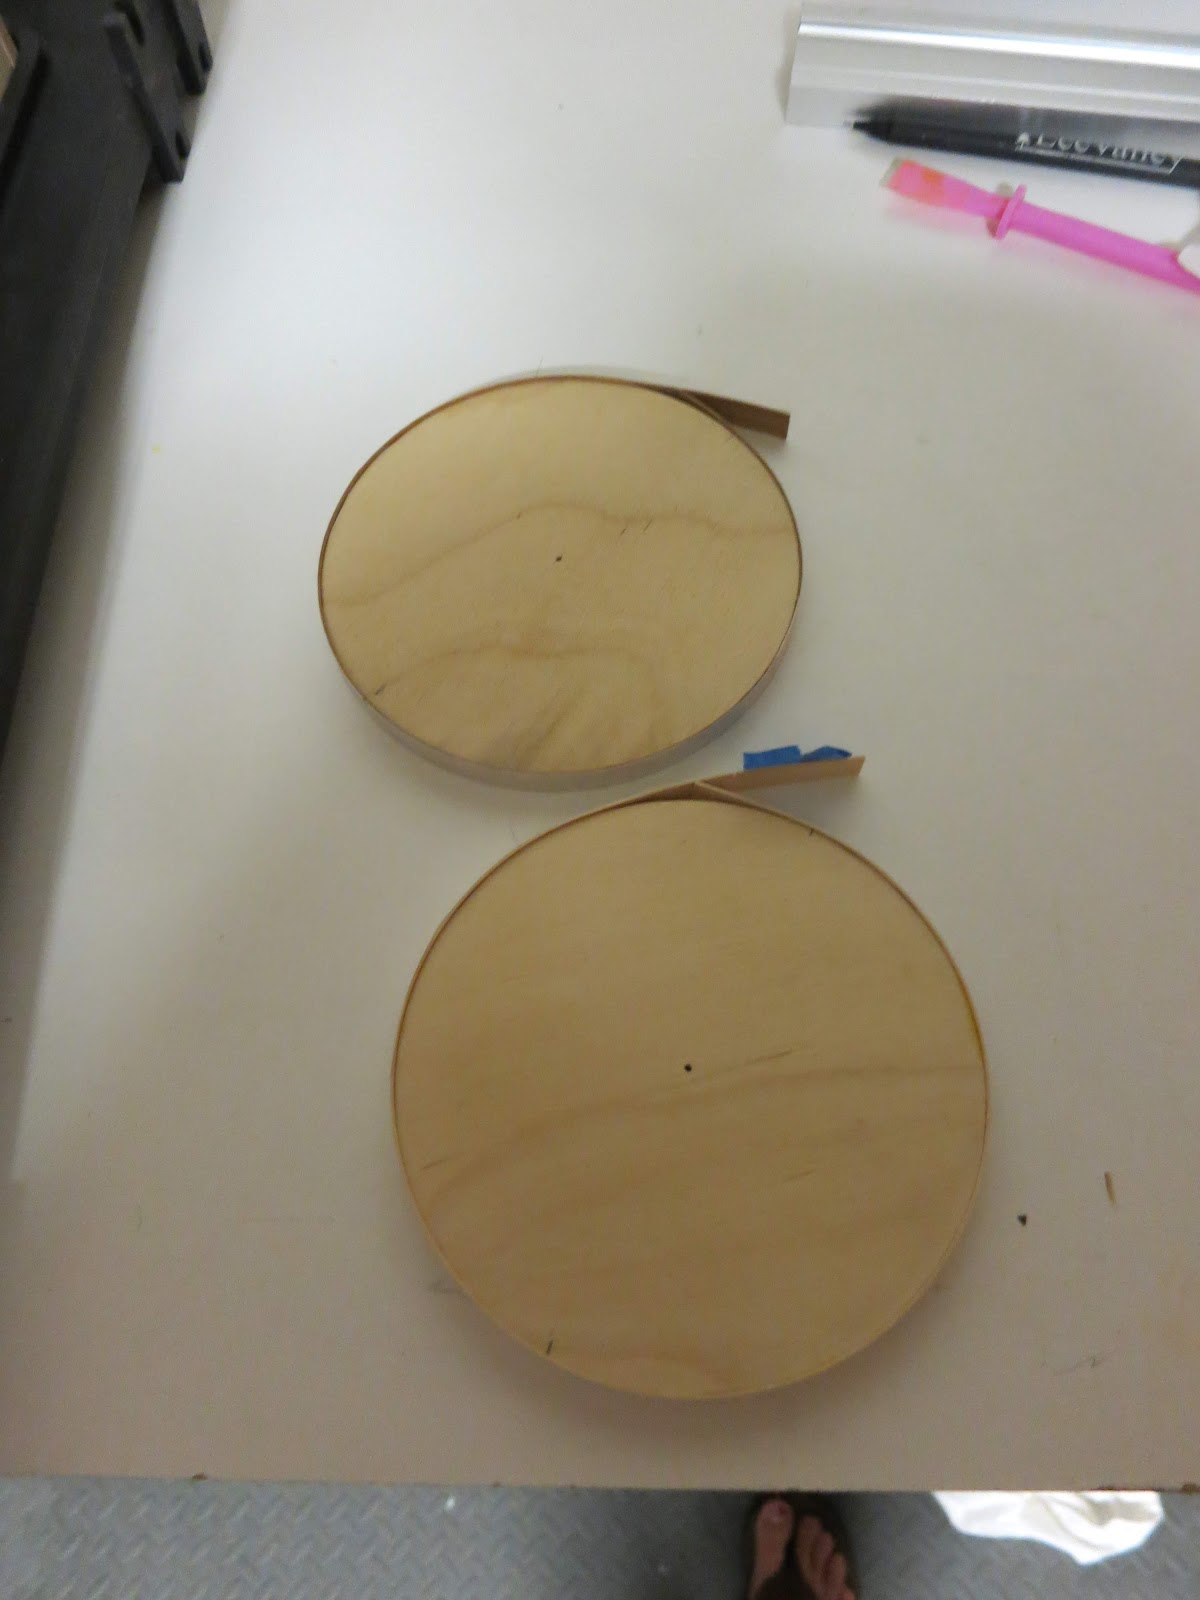
I cut two circles to final dimension from thin plywood. To make them look nicely finished, I first glued a band of veneer around the circle. You have to do this in two parts. The first is show here, where you glue almost all the way around, and leave long tails. Once this is dry, you cut through both layers at once on the unglued part, so you get a really tight and hopefully invisible seam. You then glue that last little section. The high-tech clamp you use for this process is a bunch of elastic bands! 

Next is gluing the top and bottom on. I don't have any pictures as all you really see is a lot of clamps. The top is tricky because it tries to slip off of center when you tighten the clamps. Luckily, it worked out pretty well on these. This one had slipped by a half mm, but I managed to recoup reasonably, and hopefully no one will mind it being out of centered by that tiny amount. 

After it's all glued and done, final sanding, I put a bunch of coats of Waterlox finish, to ensure it would be okay if any drips from a glass landed on it. And then I buffed it with wax to make it nice and shiny and give it even more protection. 

I also stamped my initials and the year on the backs before finishing. It's a very subtle way to sign a project. 

I shipped them out (several months late) and after a lot of fretting and hoping the postal services would do their thing, I got a call from my friend saying it had arrived and they really liked them and had put them on their newly arranged bar area! I hope they'll enjoy them as fun mementos of their happy day!