Wednesday, January 23, 2013

Christmas Projects

Before it gets too much farther into the new year, I'd like to share some of the projects I made for Christmas. I didn't get to make much during the fall due to an epic adventure that Jerome and I went on.  But I did get lots of ideas while we were away, so I hope to have more to share soon. 


To begin this is the Lego Photo I made for Christmas this year.

Project 1: Necklace Hanger
A few years ago my mum requested a way to hang up her necklaces so that they wouldn't get all tangled. I measured everything, and made a really rough prototype to figure out the size and stuff. She's been using it ever since, and it was literally falling off the wall, as I hadn't made any of the joints properly. So this Christmas I dug out my notes and made a proper one.


It's made from maple and lacewood, with many Lee Valley hooks along the sides.


There's a dowel hinge so that it can lay against the wall most of the time, but she can swing it out to access all of the necklaces.


Here it is installed which gives a better idea of how it works.


Project 2: Wooden Necktie
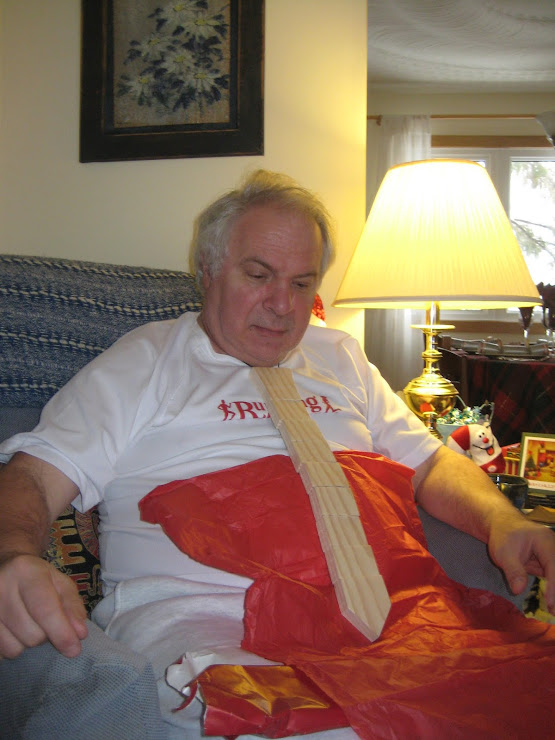
I have seen photos of wooden ties before, and in November one of the woodworking youtube guys I watch did a video on making a wooden tie. I thought it would be fun to try, and so I made a few tweaks to build it with the tools I had. It turned out not too badly and I gave it to my dad for Christmas. I think there are a few things I'd do differently a second time, but that's part of the fun! He hasn't sent me a proper photo of him wearing it with a collared shirt yet, so here he is trying it on Christmas morning!



Project 3: Tiny Wooden Door
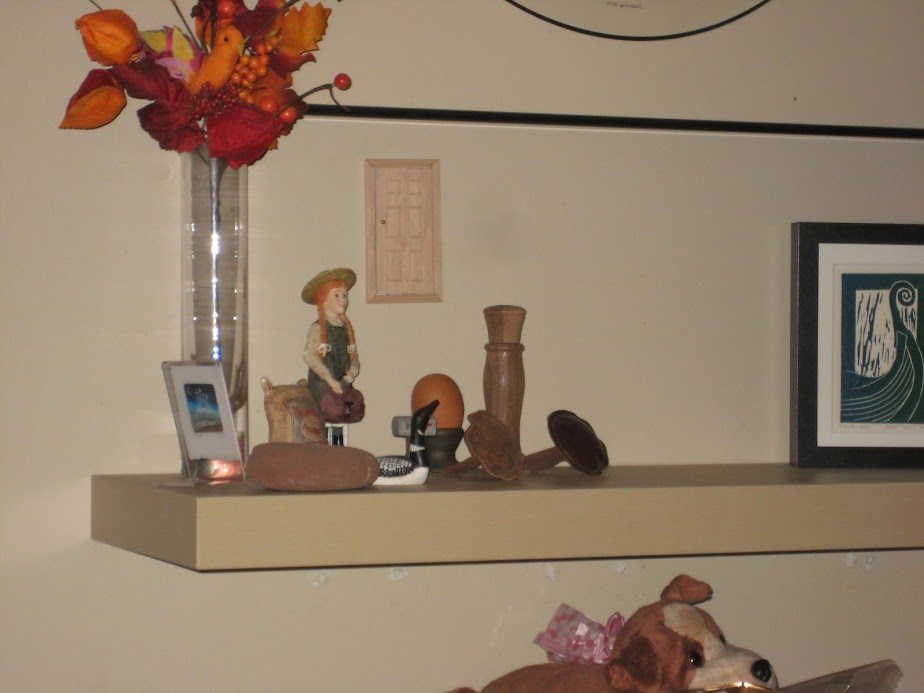
I saw the idea from this randomly online. A crafter installed tiny doors in her apartment to help her kids be less freaked out by the sounds of mice in the walls. She used doll house doors that you can buy and decorated them. I thought it was a fun idea, but didn't really want to buy anything. So I decided to attempt to build one. It was pretty fun making something so small, but a bit challenging. I did manage to get the door to open and close with tiny pins that I inserted. I also carved indents on the front and a peep hole, and installed a door knob made from another pin. The final size was 2"x4" x .1875" thick. I taped a cute picture in the back and on my last day at home, hid it behind some Christmas decorations so that my parents would find it as a surprise when they were putting everything away.


They thought it was pretty cute, and rehung it in another room.
Monday, July 30, 2012

Penrose Triangle Marquetry


My latest woodworking project was to do a simple marquetry top for a plain wooden box I had. I've always like all of Escher's Impossible things, and thought the Penrose Triangle would be a nice, and simple project. I actually spent more time choosing the veneers to get the right shading effect, than it took me to do the cutting! I applied several coats of gloss poly on it to give it a durable finish since the box will be handled quite a bit.


Tuesday, July 17, 2012

Giraffe Update

Back in February I posted about some stuffed giraffes I'd been making for some family and friends. Well since then I've made a few more, and have gotten back some pictures of them being put to good use by some pretty cute little folks!  

I had to make a second one for little Sebastian, as it is one of his favourite toys, and he knows that its bedtime as soon as he sees his giraffe!


And this is Elissa's first reaction to "RG" as her giraffe is known. I think she likes it! 

Monday, July 9, 2012

Wooden Name Tag

Since I've moved here I've joined both the local woodturning club and more recently the marquetry club. The turning club requires a name tag - ideally turned, and if you're caught at a meeting without one you are supposed to make a $1 donation to the club. So this winter I finally had an idea for making one that involved both turning and marquetry, so that I could be covered for both. The backer disc is turned around the outside as well as a small indent in the front where I glued in the marquetry I cut with an exacto knife. I designed it with my name and a maple leaf on it as a conversation starter to meet new people. The whole thing is 3" across, and so the letters were very challenging and tiny, which is why I decided against removing the centers of the letters. I glued a pin to the back and now wear it and save a dollar every month at the meetings!


Sunday, July 1, 2012

Lego Photo #6: Happy Canada Day!!!


Happy Canada Day from Jerome and I!!

 
And we found a beaver friend who wanted to celebrate too!

Tuesday, June 19, 2012

Lego Photo #5: My Dad and I on a Bench

This was my second Lego photo that I took. It was for Dad's father's day last year. He has an affinity for benches, so I thought us hanging out on a bench would be fun, and I wanted to incorporate the outdoors.  I found a spot across from our apartment under a tree that had a nice root to put the bench on, and a day when the grass wasn't too long. These were the top two.

I liked this one because of the sky in the background, and the grass in the foreground. 

But I liked the better focus on the minifigs more in this one. 

Sunday, June 10, 2012

Leather Moustachios


My latest sewing endeavour has been to make a series of leather moustaches. I chose a variety of types and colours and stitched them to background squares. I carefully stopped sewing before I got all the way around, so that I could add in a bit of stuffing, to get them dimension. Each frame is about 6"x6". I got the leather from someone who was giving away their sample kits for couches. So I have many small rectangles, and have been trying to come up with projects to use them on. Here are some close ups to see the textures.